Explore our IP Address Database Downloads for instant access to our IP address insights
Learn more
A static IP address is a fixed, unchanging identifier assigned to a device on a network. This permanence ensures devices like servers, printers, or security systems can be reliably accessed without needing to track changing addresses.
Static IPs are often used in settings requiring consistent connectivity, such as hosting websites, enabling remote access, or managing networked devices efficiently. For example, in an office, assigning a static IP to a shared printer allows all employees' devices to connect reliably without reconfiguring settings if the printer's IP changes.
What is a Static IP Address?
An IP (Internet Protocol) address is a unique identifier assigned to each device on a network. A static IP address does not change over time. Unlike dynamic IP addresses, which are assigned by DHCP (Dynamic Host Configuration Protocol) and can vary, static IP addresses are manually configured and remain fixed.
Learn more about IP address information.
Static IP Address Example
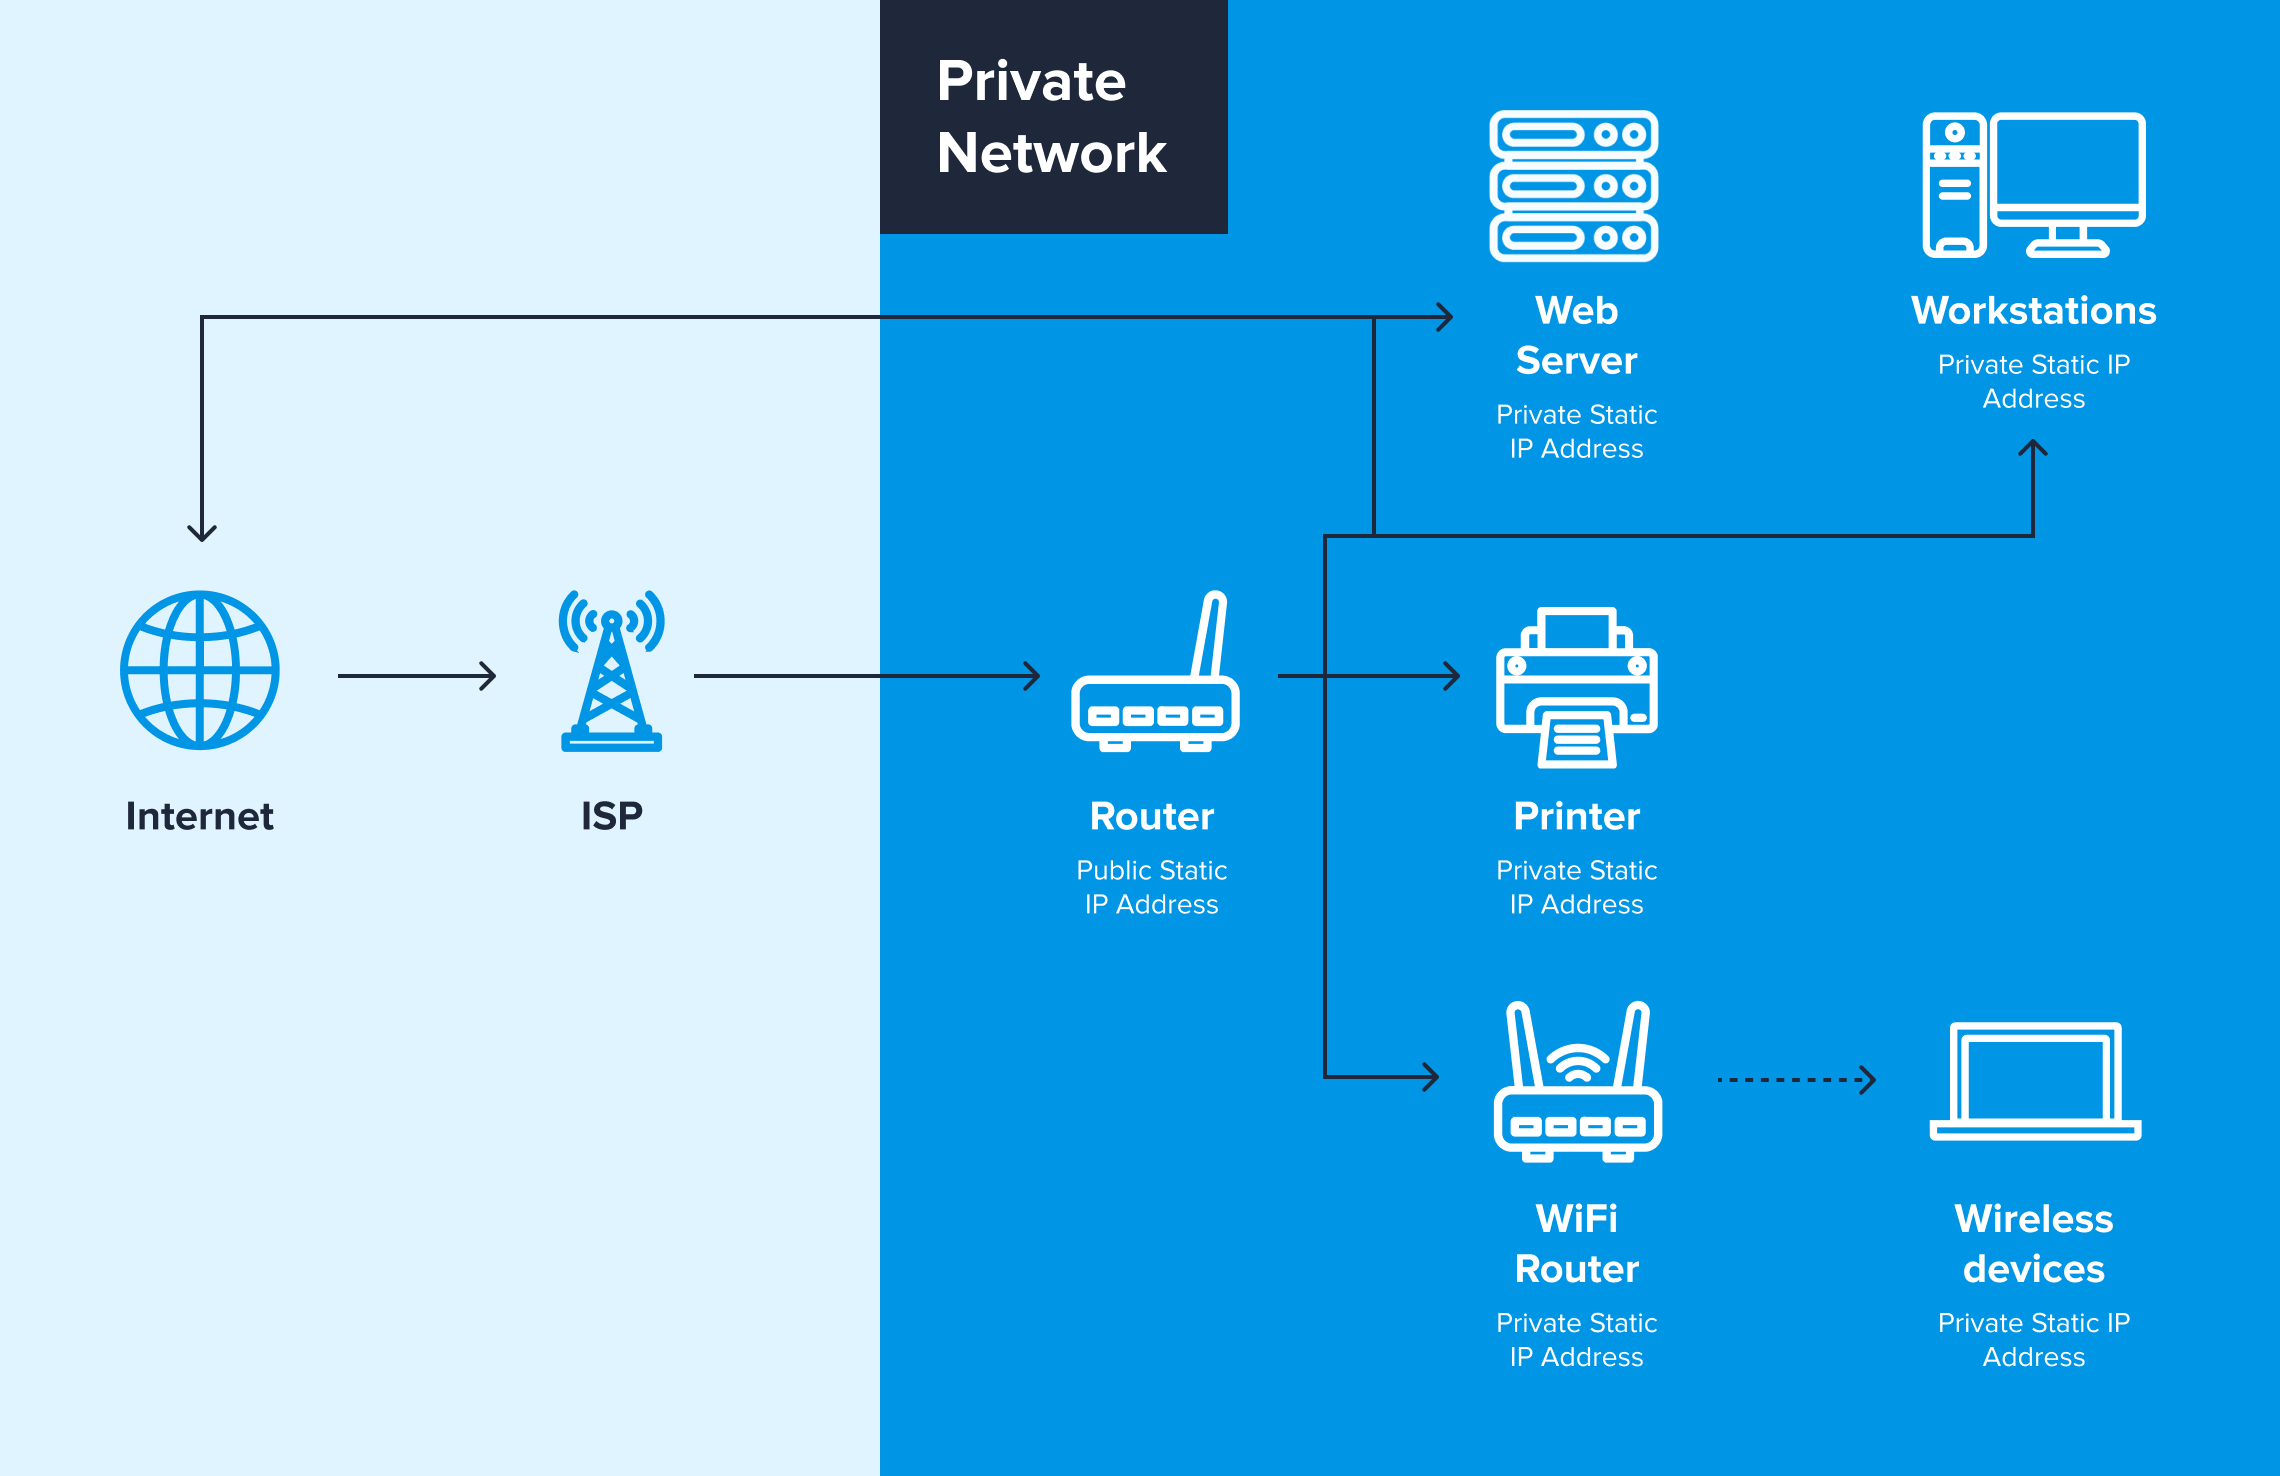
Internet is accessed through the connection provided by the Internet Service Provider (ISP). The router has a static public IP address that is shared by all the devices connected to the private network, such as printers, workstations, web servers, WiFi routers, and wireless devices.
Based on the requirements, devices within the private network are given either a dynamic or a static IP address. For example, a static private IP address is needed for the web server for easy configuration, while devices connected to the WiFi do not require a static IP address.
Find out more about IP access control.
Setting Up a Static IP on a Windows Device
The process involved in setting up a static IP address depends on the operating system that the device is using. Although setting a static IP address is straightforward, it varies across different operating systems.
I will first walk you through how to set it up on a Windows 10 OS and Windows 11 OS.
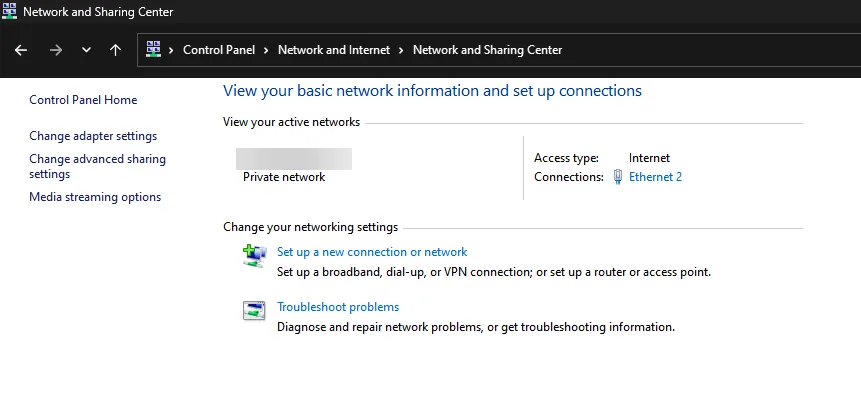
Step 1: Open Network Settings
Go to your Windows control panel and navigate to Network and Internet settings. Alternatively, you can visit the following:
Control Panel\\Network and Internet\\Network and Sharing Center
Alternatively, You can also get your active network connections from this Network Connections settings:
Control Panel\\All Control Panel Items\\Network Connections
You type the following command on Windows Run to visit this settings directory.
ncpa.cpl
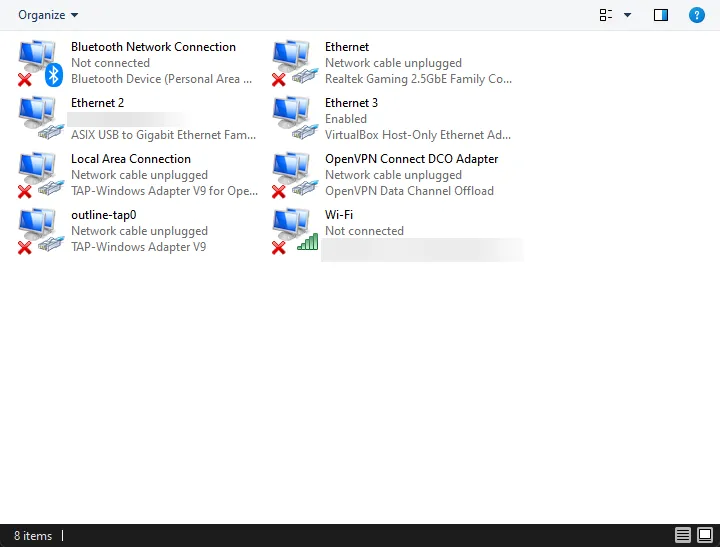
Step 2: Locate Your Network Adapter
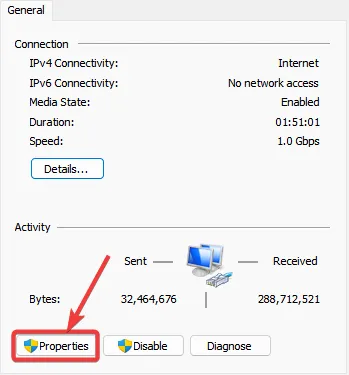
From here, select your active network connection, which could be WiFi or Ethernet. I will choose the Ethernet option. Click on the “Properties” button.
Step 3: Access Internet Protocol Settings
From here, double click on "Internet Protocol Version 4 (TCP/IPv4)" and select "Use the following IP address.”

Step 4: Set Up a Static IP
Now you can enter the IP address, which will be your static IP address, Subnet Mask (usually 255.255.255.0), and Default Gateway.
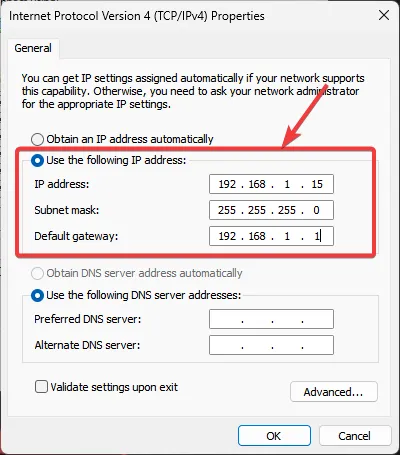
- IP address: When selecting a static IP address, make sure it falls within your network's range and is not currently in use by another device. For example, you could choose 192.168.1.15.
- Subnet Mask: Enter the subnet mask for your network (usually 255.255.255.0).
- Default Gateway: Please enter your router's IP address, such as 192.168.1.1.
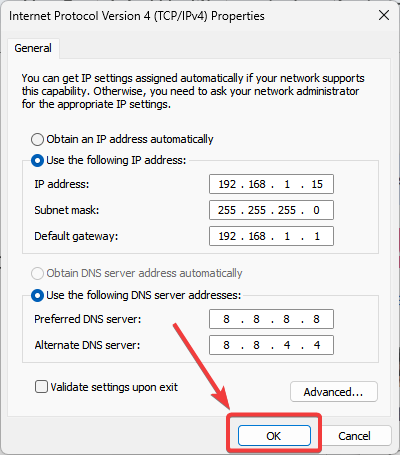
Step 5: Configure DNS Servers
You can now set up the DNS server addresses. You can choose:
- Google’s DNS server
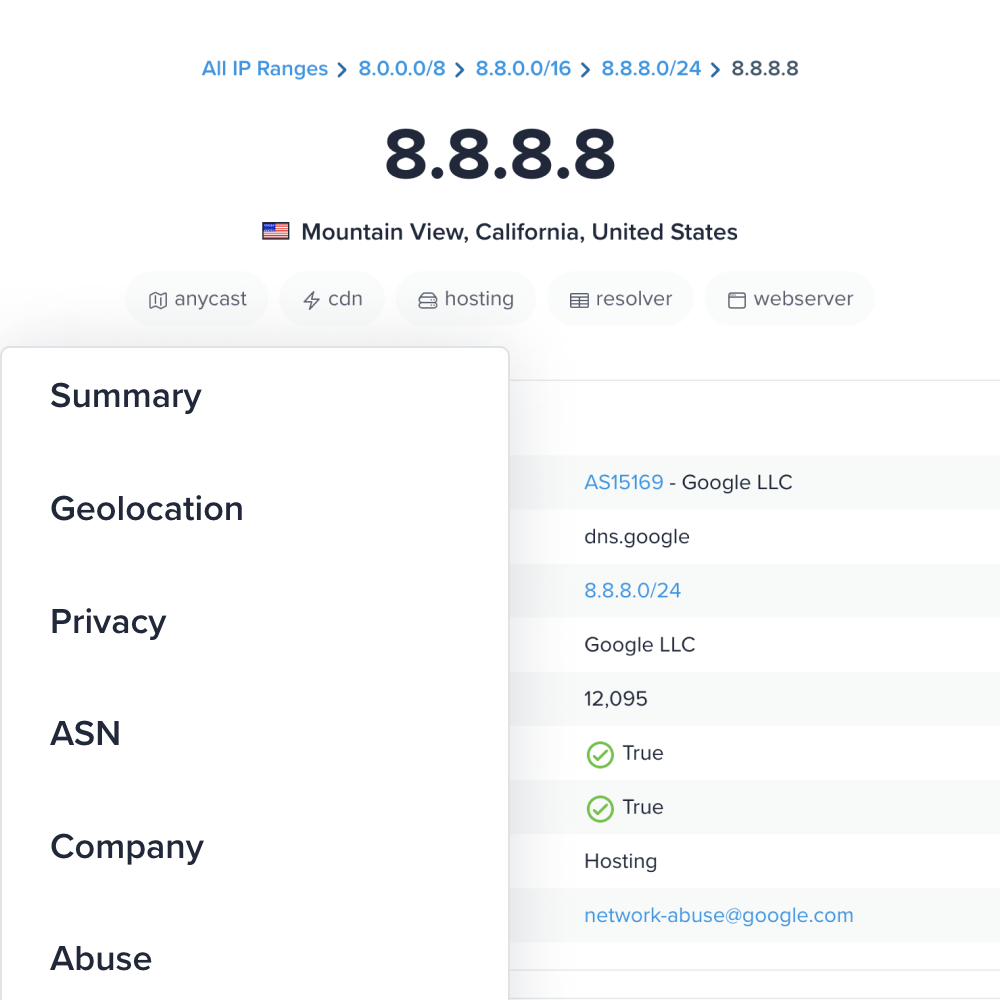
- Preferred DNS server: Use a preferred DNS server like 8.8.8.8 for Google DNS
- Alternate DNS server: Have an alternate DNS server like 8.8.4.4 for Google DNS as a backup
- Or, Cloudflare’s DNS server
- Preferred DNS server: 1.1.1.1
- Alternate DNS server: 1.0.0.1

Step 6: Save and Apply Settings
After you have set up the IP address and related information, click on OK and exit out of the settings. Then restart your computer.
Step 7: Verify the Static IP
Then you can verify your static IP address from your PowerShell or CMD by running the following command:
ipconfig
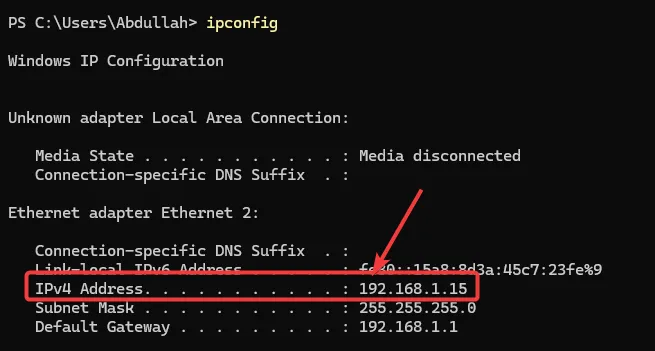
Look for the IPv4 address value for your active Internet connection.
Setting Up a Static IP on a Mac Device
Now I’ll switch to setting up a private static IP address in a Mac OS device.
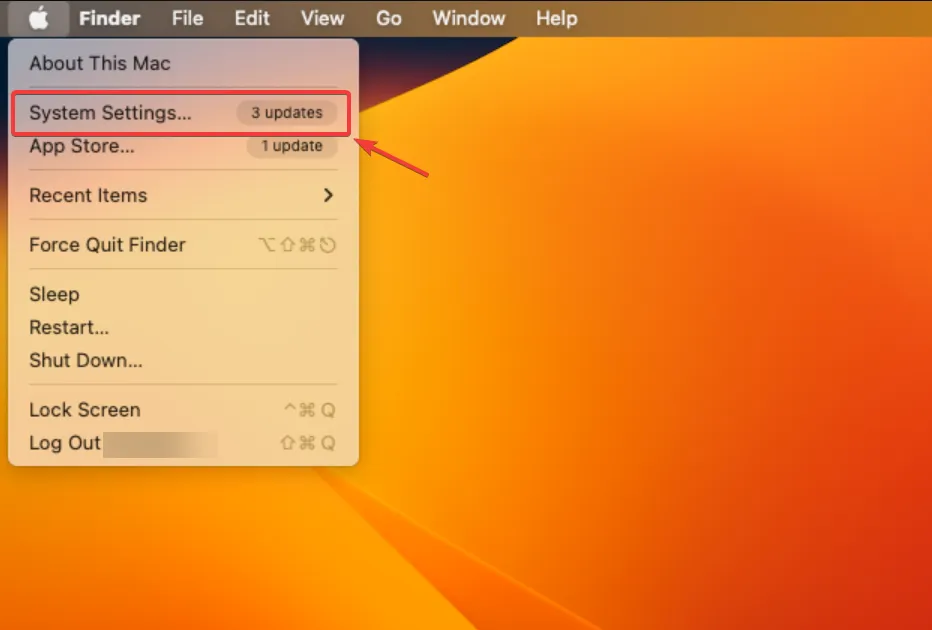
Step 1: Open System Preferences
Click the Apple Menu in the top-left corner of your screen. Select System Preferences from the drop-down menu.
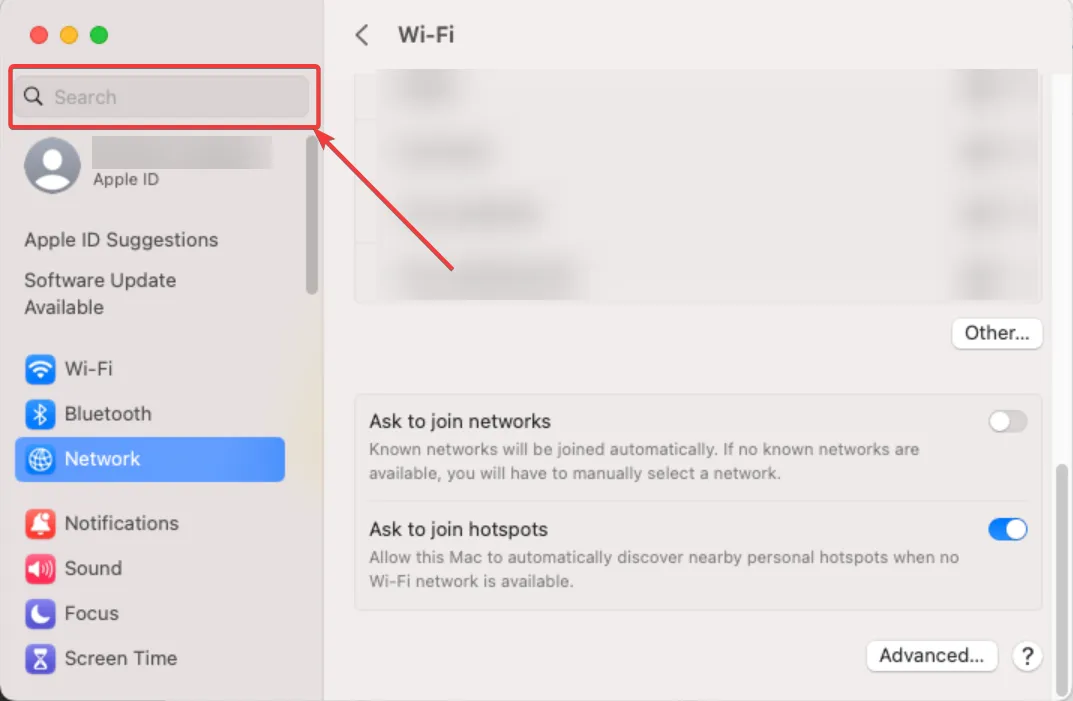
Step 2: Navigate to Network Settings
In the search bar of your settings, search for TCP/IP. This will bring you directly to the IP settings configuration of your actively connected network.
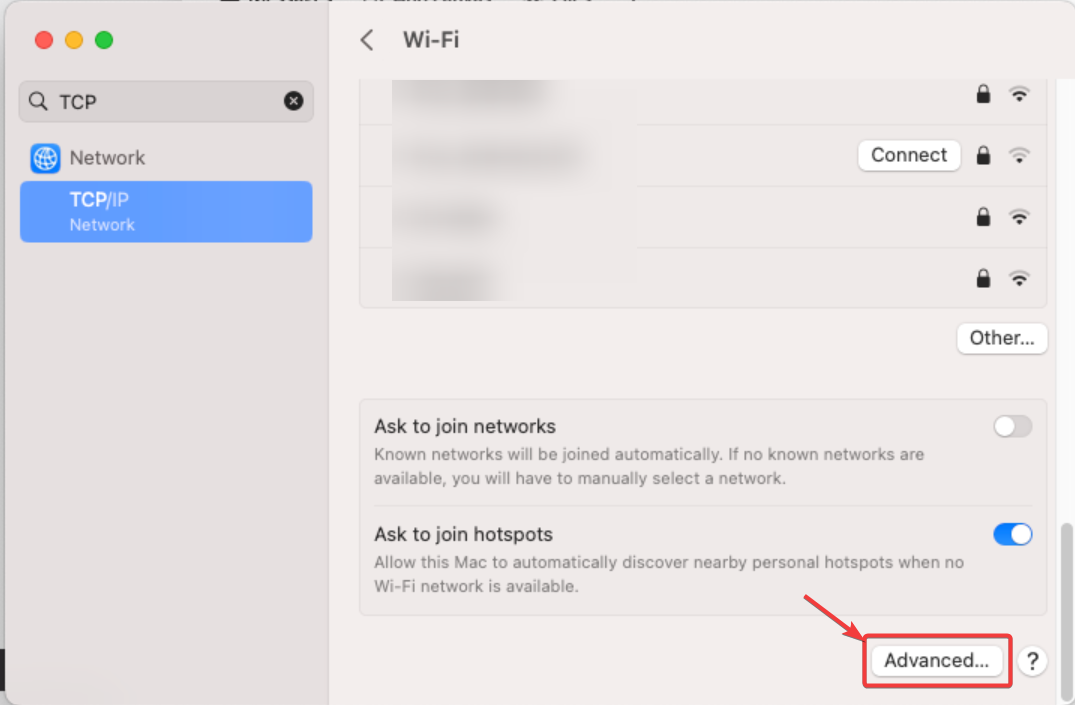
Step 3: Access Advanced Settings
Click the "Advanced..." button in the lower-right corner of the window.
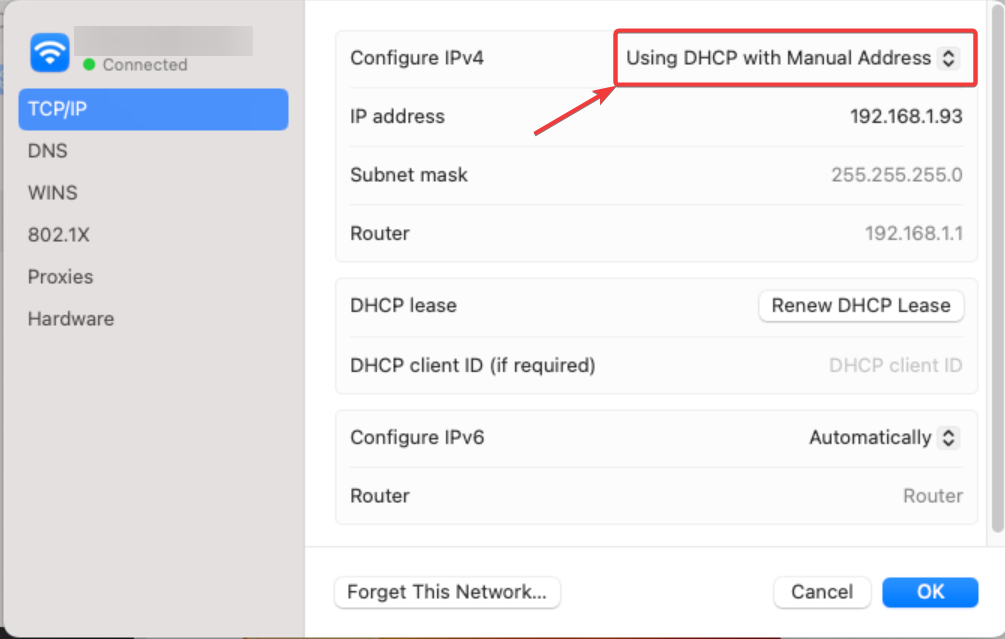
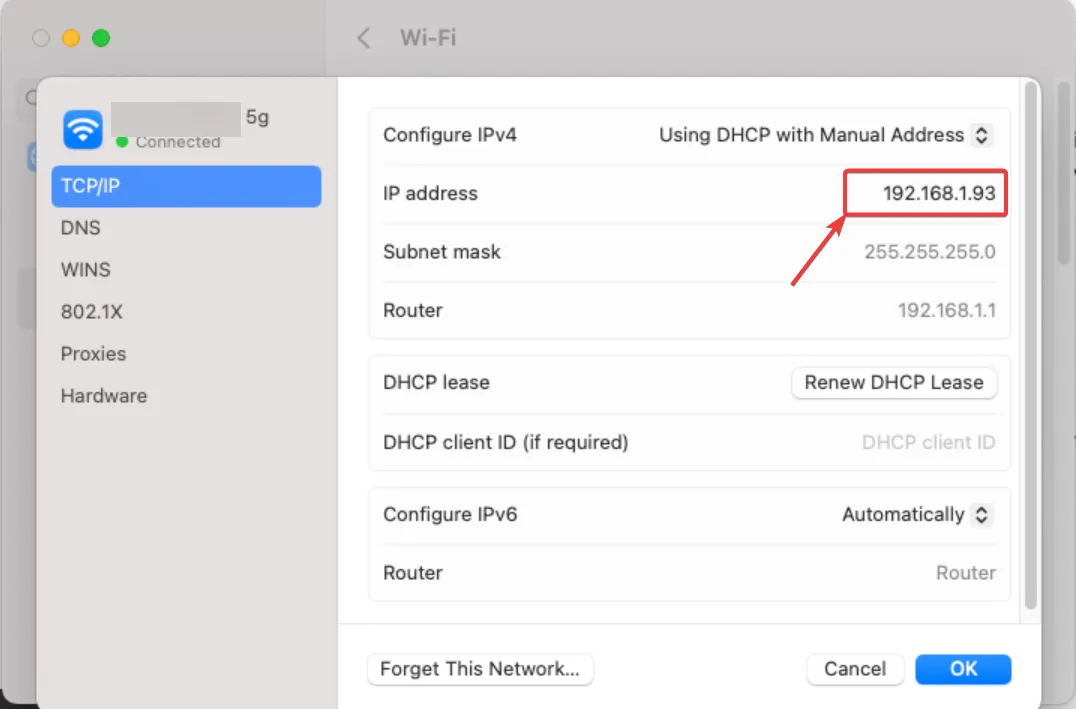
Step 4: Configure the IP Settings
From there, change the setting for IPv4 from DHCP to “Using DHCP with Manual Address."
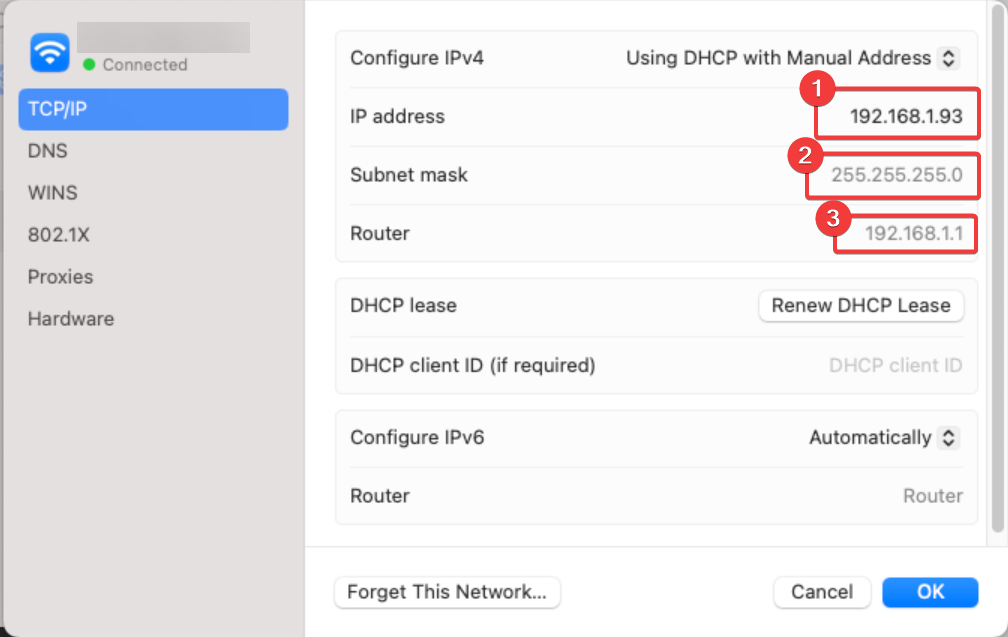
Step 5: Enter the Static IP Details
- Choose a static IP address within your network's range and not already in use (e.g., 192.168.1.39).
- Use the subnet mask 255.255.255.0 for most networks.
- Enter your router's IP address (e.g., 192.168.1.1).
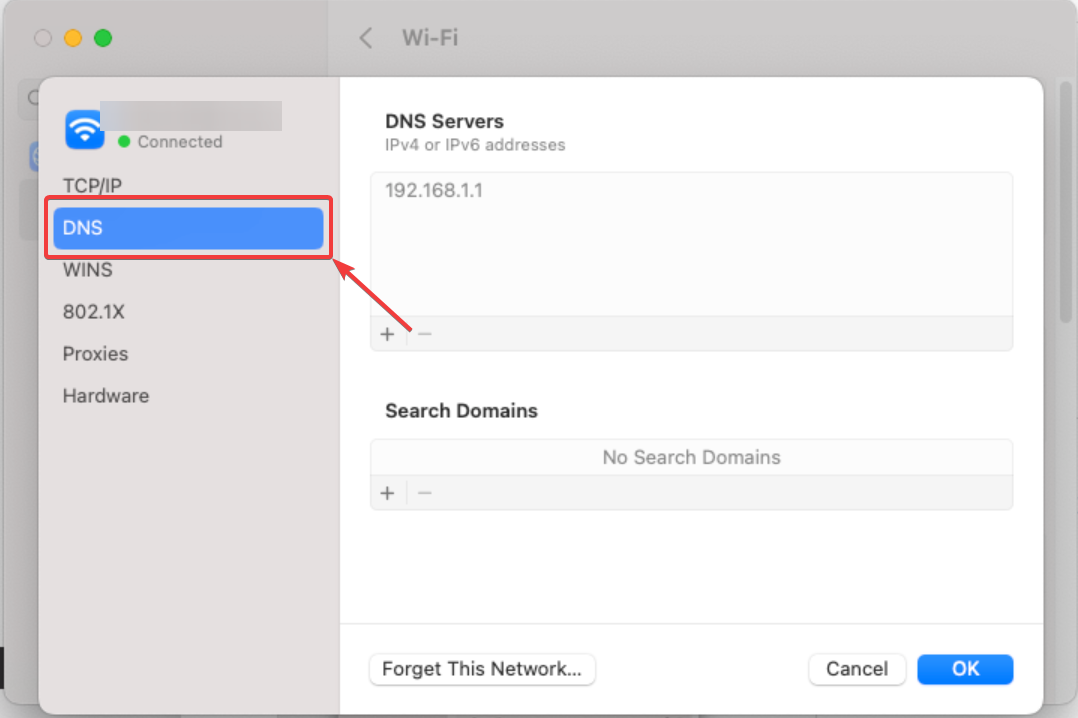
Step 6: Configure DNS Settings (Optional)
Optionally, to change DNS settings:
- Go to Advanced settings and then the DNS tab.
- Click the + button to add DNS addresses:
- Preferred DNS: 8.8.8.8 (Google DNS)
- Alternate DNS: 8.8.4.4 (Google DNS)
Step 7: Save and Apply Changes
After that save the settings and exit out. You can see the updated static IP address from your network settings or by running the ipconfig command.
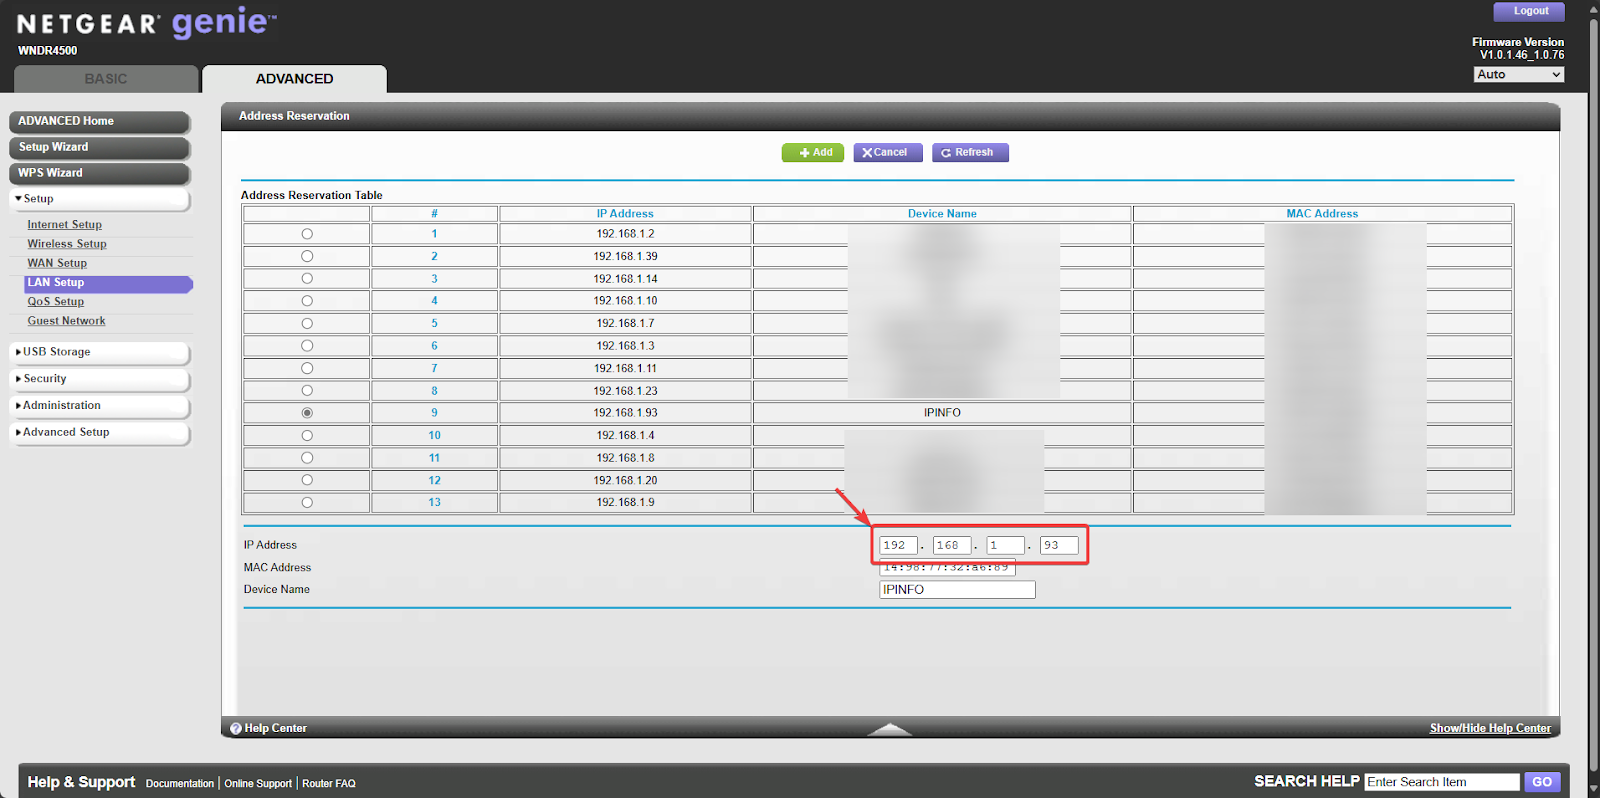
Setting Up a DHCP Reservation on Your Router
Static IPs can also be set on network router-level settings. For this example, I am using a netgear router as an example.
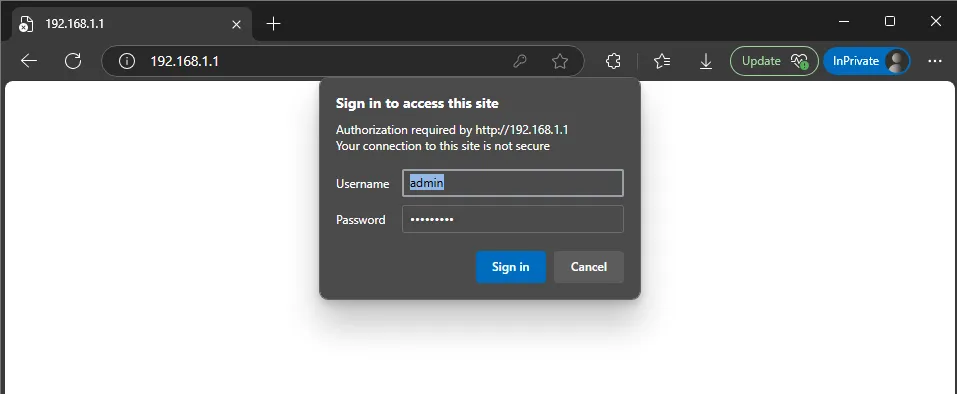
Step 1: Access Your Router’s Admin Panel
To access your router settings, simply enter your router's IP address (usually 192.168.1.1 or 192.168.0.1) in your web browser. If unsure, check your router's manual. Log in with your admin username and password, which can be found on the router or provided by your ISP.
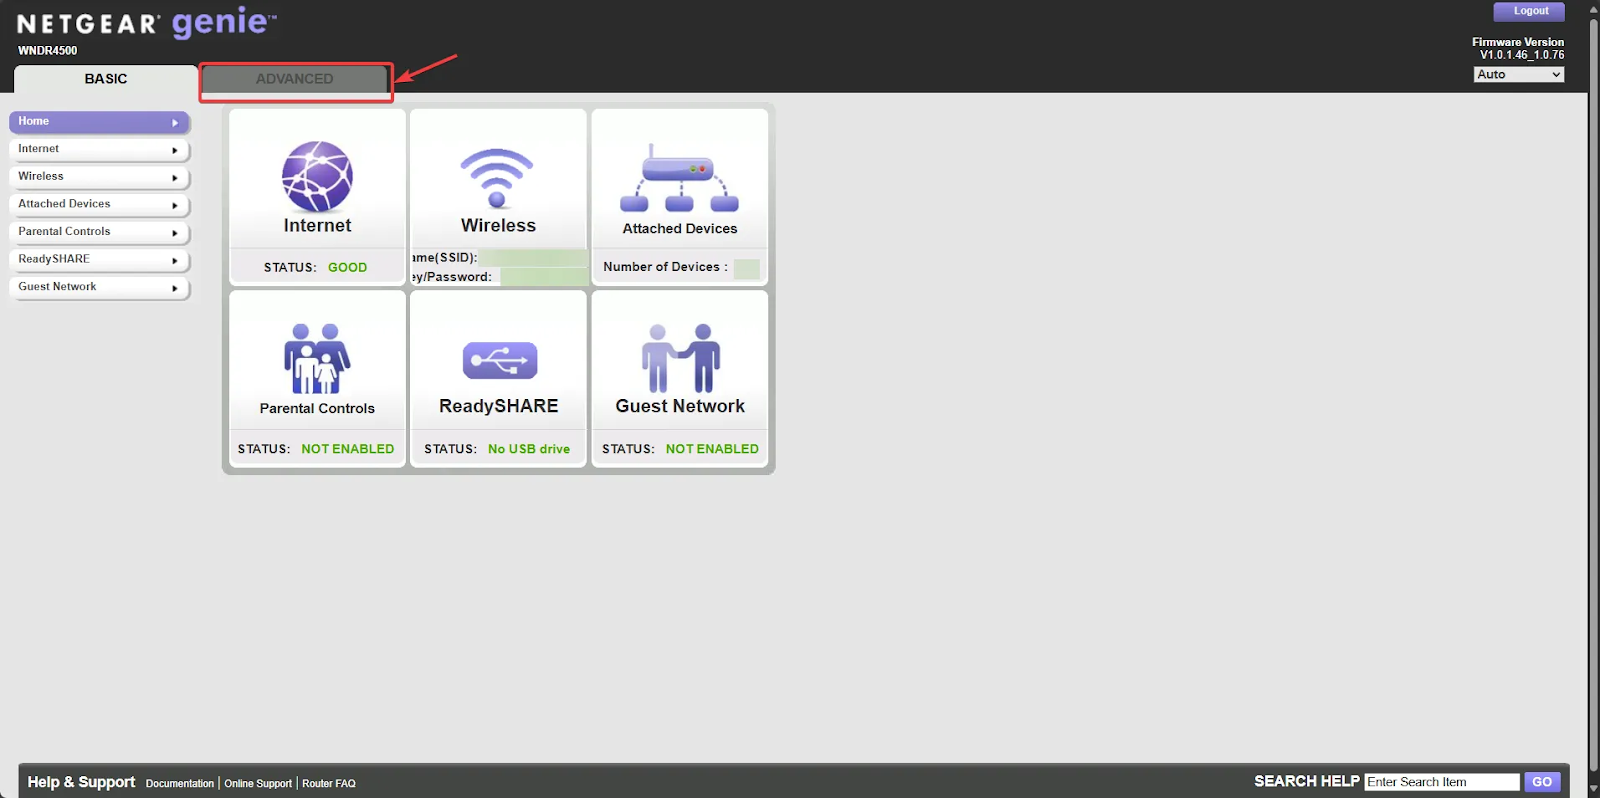
Step 2: Find the DHCP Settings
To find DHCP or LAN Settings, go to Network Settings or Advanced Settings in your router's menu. This step is dependent on the router brand and model.
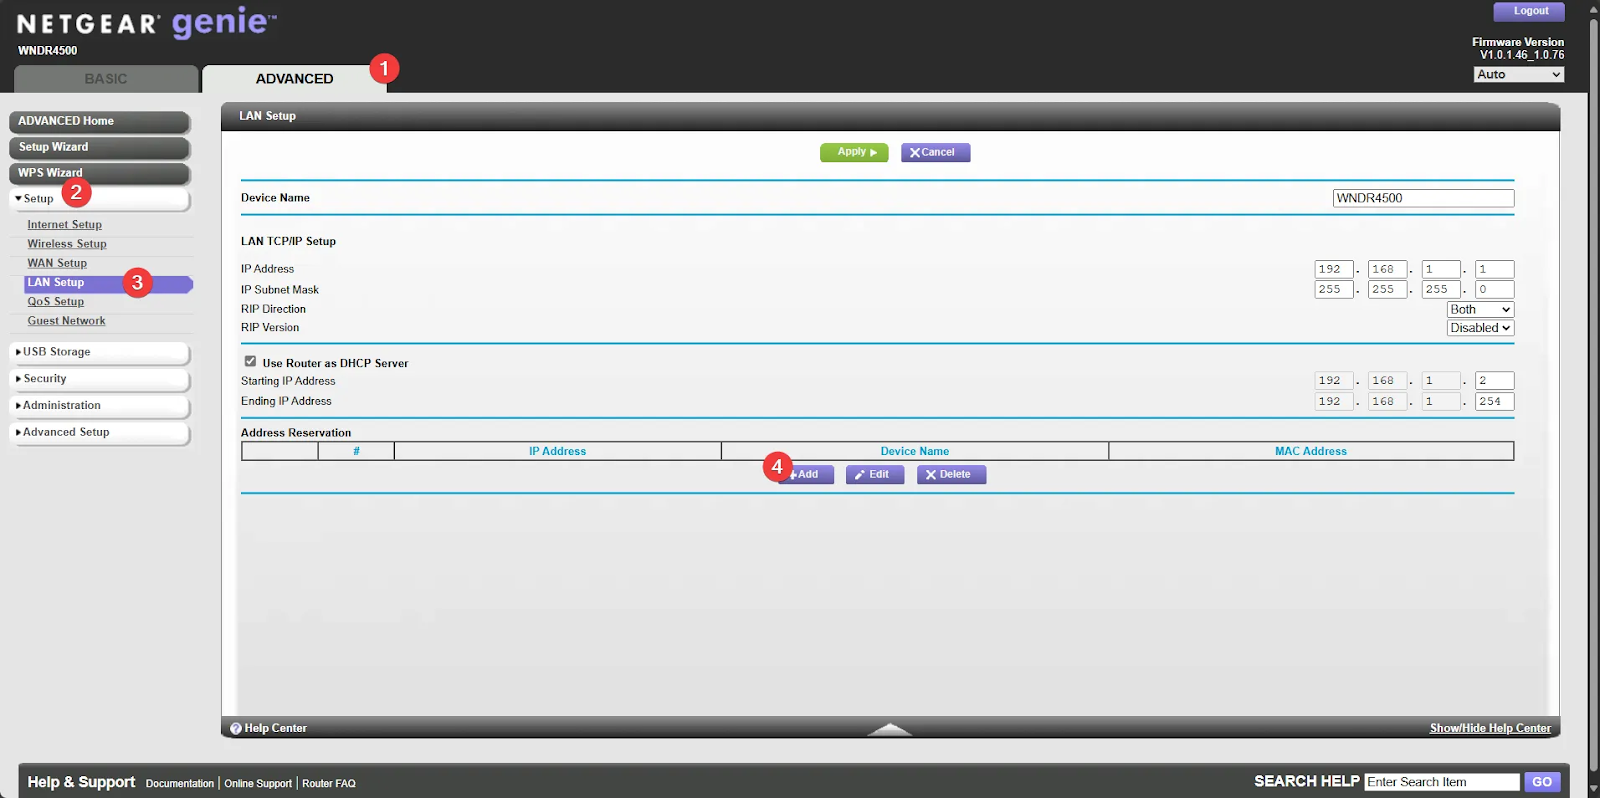
Step 3: Locate the DHCP Reservation Section
From the advanced settings, find LAN setup configuration.
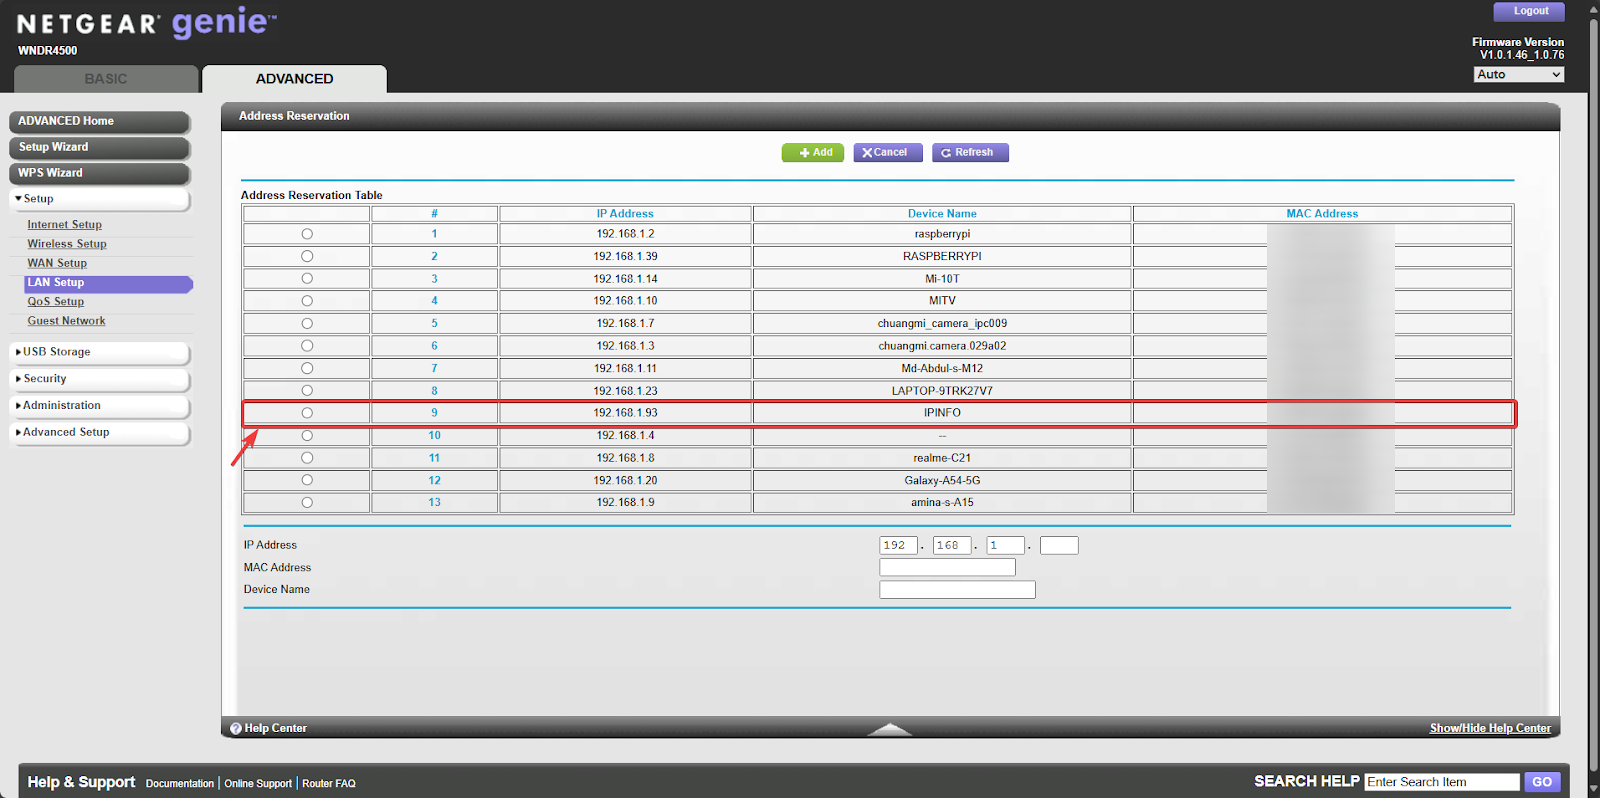
Step 4: Identify the Device
After you have come up with the plan, identify the device whose IP address you want to change.
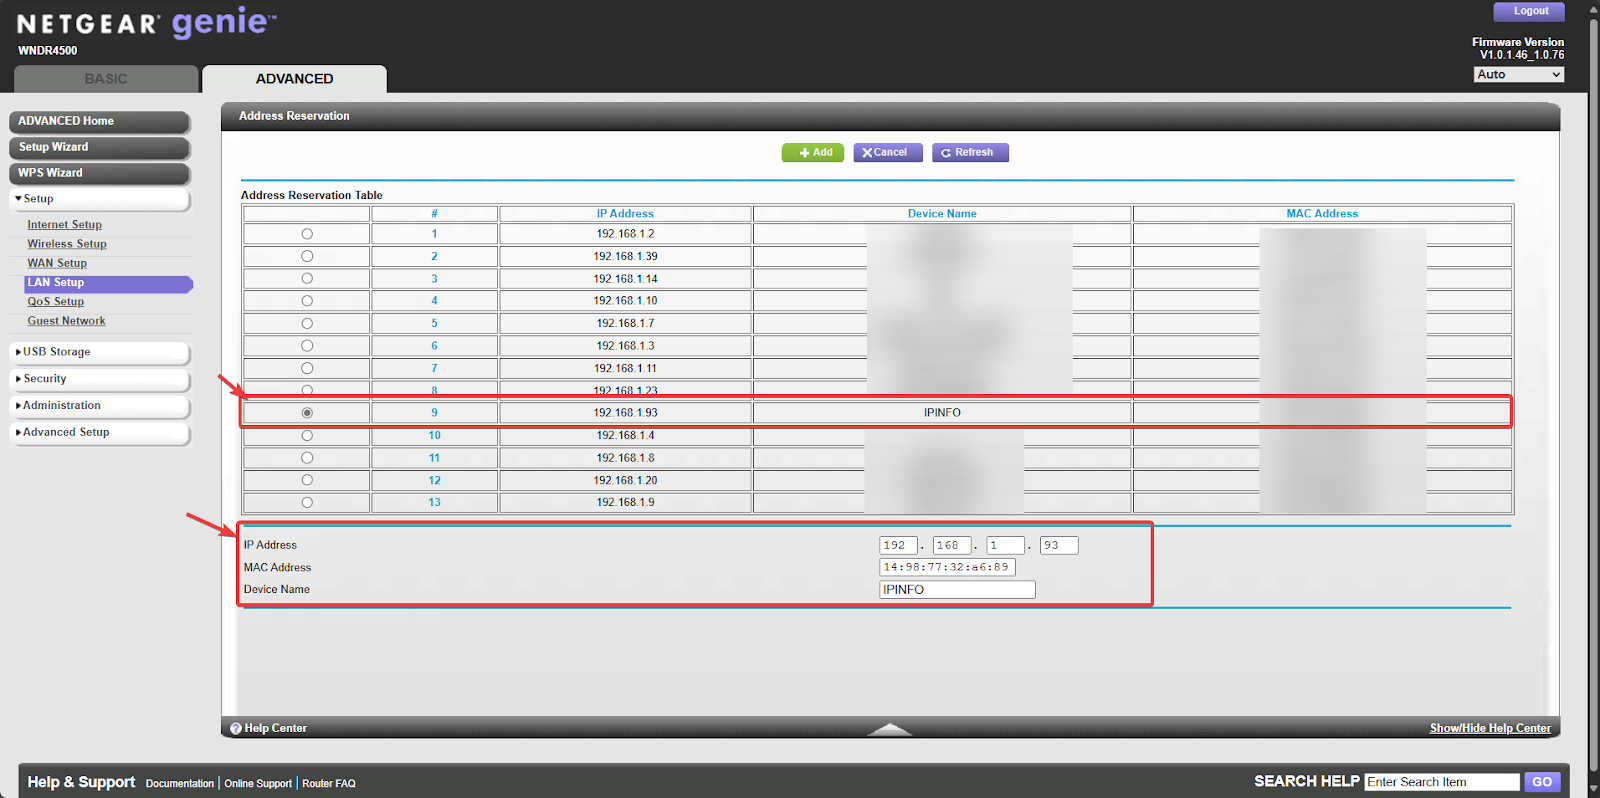
Step 5: Add the Reservation
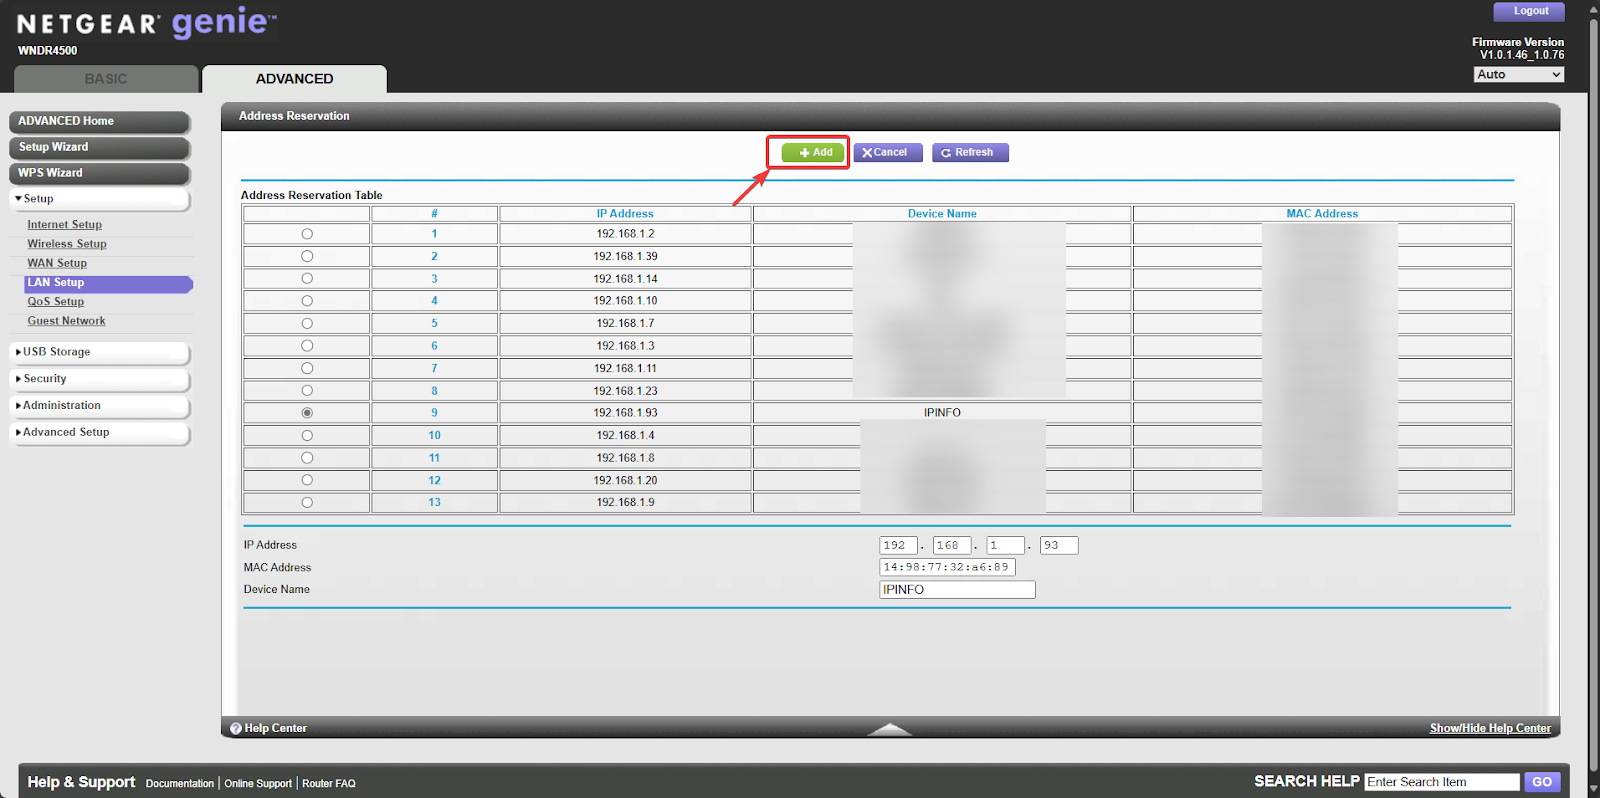
Set the static IP address by pressing the add button.
Step 6: Save Changes
Save the DHCP reservation settings. The router may require a restart for the changes to take effect.
Step 7: Verify the Reservation
Like before, you can now check whether the local static IP address of the device has changed.
Wrapping Up: Static IP Address Set-Up Process
Although IPinfo cannot provide information about private and local IP addresses, IPinfo's APIs and database downloads deliver precise, real-time IP address data for businesses worldwide. We set the standard in IP address location accuracy.
From providing geolocation information to identifying masked IP addresses to providing privacy detection data, we help companies enhance security, improve user experiences, and optimize network operations.
Get access to industry-leading IP data
Locate users, customize experiences, eliminate site risks, and much more.
About the author

Abdullah leads the IPinfo internet data community and he also works on expanding IPinfo’s probe network of servers across the globe.